OVERVIEW
Division A, also called the bow or forward section, is that part of SS Fawkes comprising all spaces between the stem of the ship and the forward transverse airlocks into leading Division B. Division A is approximately 45 meters (148 ft) in height and 51 meters (167 ft) long at its longest point, between Decks 6-10; these decks are built between twelve rib-like frames, while Decks 1-5 and 11-16 are built between eight or fewer frames.
This section is used for navigation, communications, crew berthing, shipboard operations, computing, shield and deflector control, tractor control, crew storage and auxiliary systems management. It is armed with stem and dorsal Cardassian spiral wave banks, though only the former is operable. The crew will likely spend most of their free time in Division A, since the section's upper decks are in relatively good shape, having benefited from some relatively recent renovation. |
DECK ONE: CONNING TOWER
Deck 1 is 27 meters (88 ft) long, 18 meters (59 ft) wide and constructed around four latitudinal frames, numbered 9 through 12, with the final three connected to one another by a center-line hatchway marked 1-11.
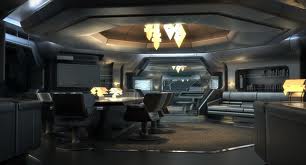
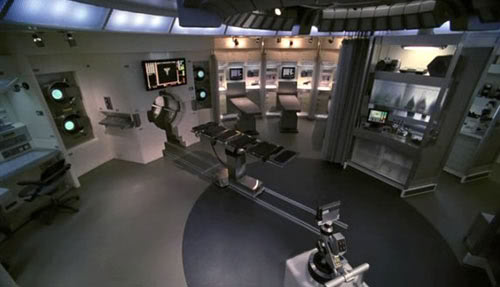
Frames 9 and 10 are dedicated to a large 11-meter-long (36 ft) compartment, the bridge (C101).
Frames 9 and 10 are dedicated to a large 11-meter-long (36 ft) compartment, the bridge (C101).
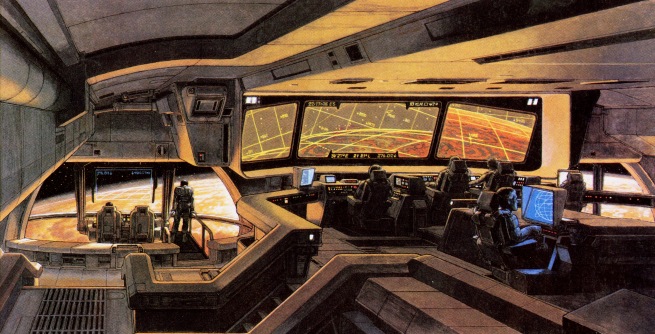
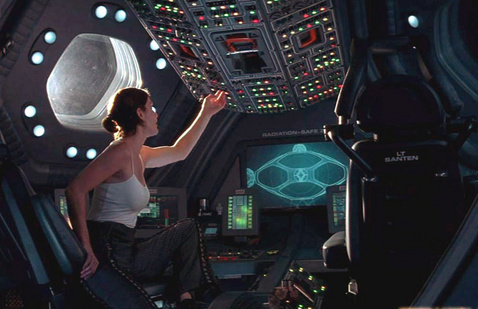
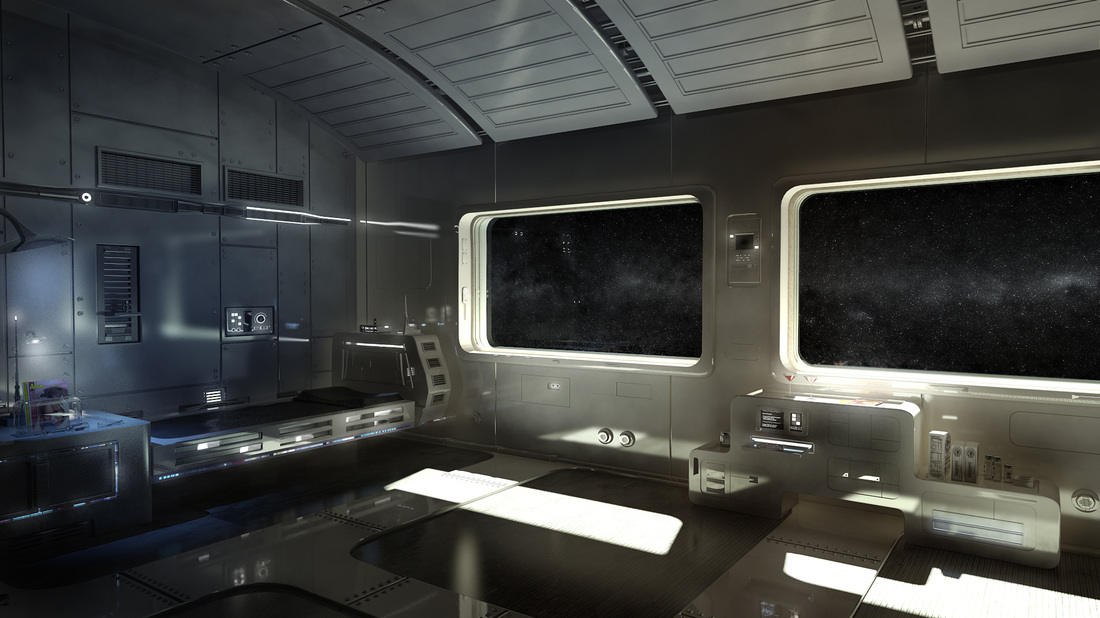
The bridge can be subdivided into three split-level sections: Frame 9's observation area, Frame 10's control center, and a short elevated walkway connecting the two to both the portside personnel lift E102 (via hatchway 1-10-1) and hatchway 1-11, located at the rear of the compartment. 1-11 leads into Frame 11 and passageway 1LP0. Most of Frame 9 and the starboard side of Frame 10 are ringed by large observation windows.
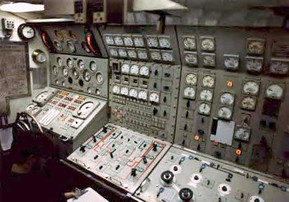
The control center is highest, connected by two short, railed staircases to the observation area. It features four computer stations beneath the primary systems displays dedicated to (from port to starboard) flight control, tactical, sensors and shipboard operations, as well as a separate station for communications. A food replicator (currently inoperable) is located behind the sensor station, while a grate behind the flight control station leads down into the guts of the various control systems, linking forward to hatchway 1-10-1.
The observation area includes portside hatchway 1-9-1 to service lift terminus E103, and a starboardside conference table and refrigerator. Next to the refrigerator is hatchway 1-10-1 into engineering service under the control center. At the bow (accessed by means of a cantilevered gangway) are a pair of command chairs and associated heads-up display. A pair of benches ringing this gangway includes a code-controlled compartment containing the autodestruct system controls and storage for two hand phasers (currently empty).
PASSAGEWAY 1LP0 [LONGITUDINAL CENTER-LINE FRAME 11]
|
The aft hatchway 1-11 leads into the 1LP0 passageway and Frame 11. A small single-person transporter bay, E104, is located on the port side just behind 1-11 via 1-11-2; across from it is hatchway 1-11-1 leading into the navigation room C105. The navigation room also contains a railed scuttle leading down into Deck 2's passageway 2LP0.
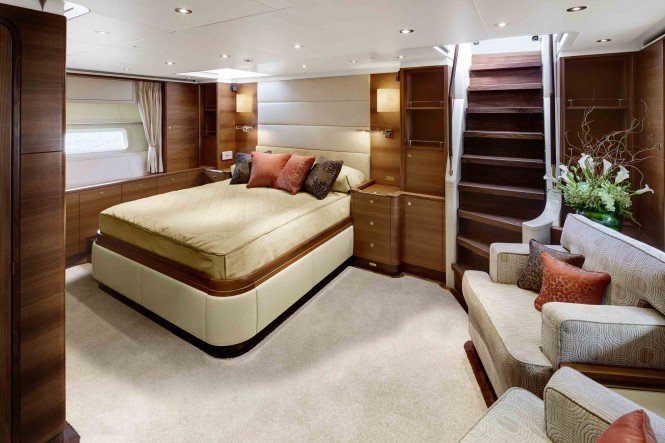
There are seven other hatchways leading off of 1LP0. From fore to aft, these hatches lead into the portside escape pods A106 and A108 (via 1-11-4 and 1-11-6); the starboardside comm room C107 (via 1-11-3) and primary switchboard C109 (via 1-11-5); portside head L110 (via 1-11-8) and the starboardside alcove entry to the captain's stateroom L112 (via hatchway 1-12) with washroom access (via hatchway 1-12-1). Both aft compartments are part of Frame 12. Stateroom L112 is assigned to Ryan Warner. |
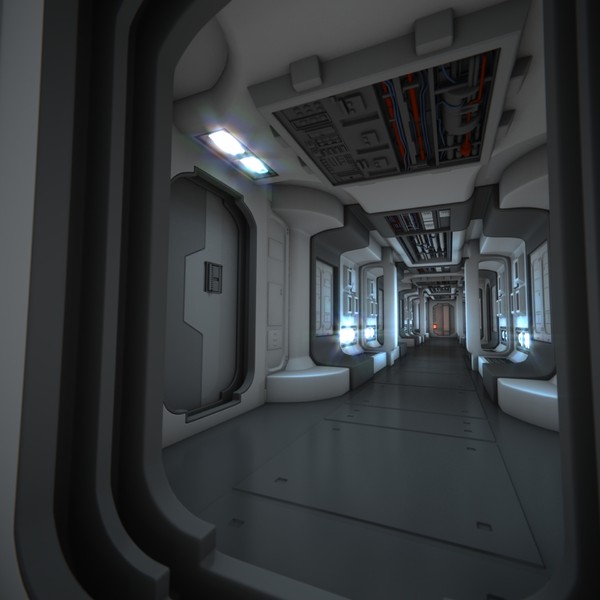
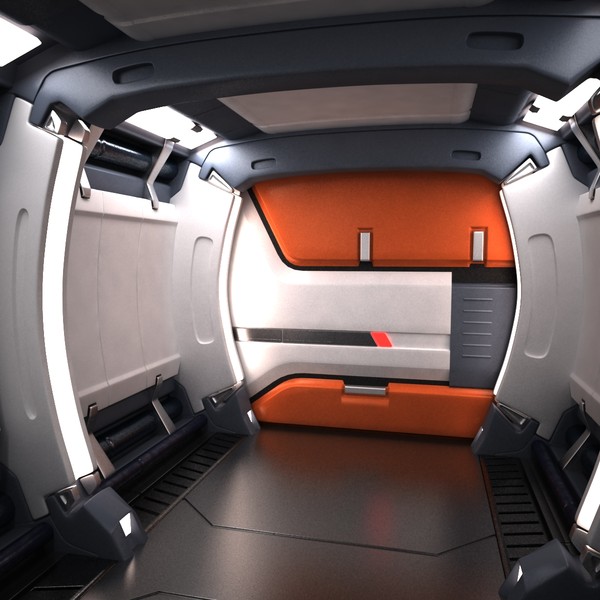
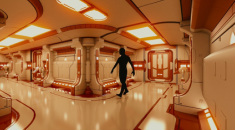
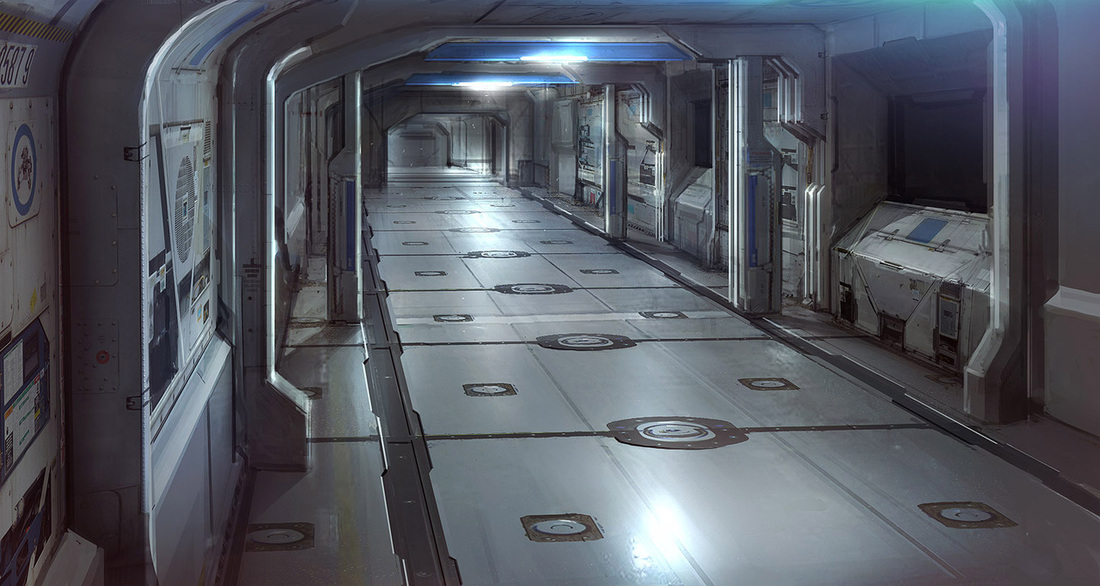
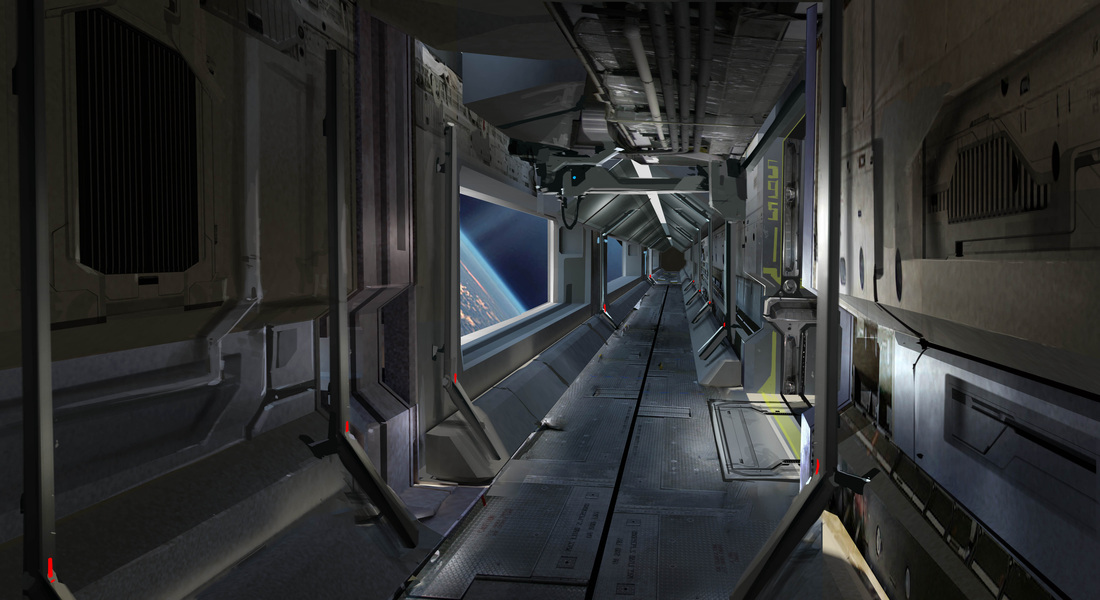
Passageway 1LP0 as viewed aftward from 1-10.
|
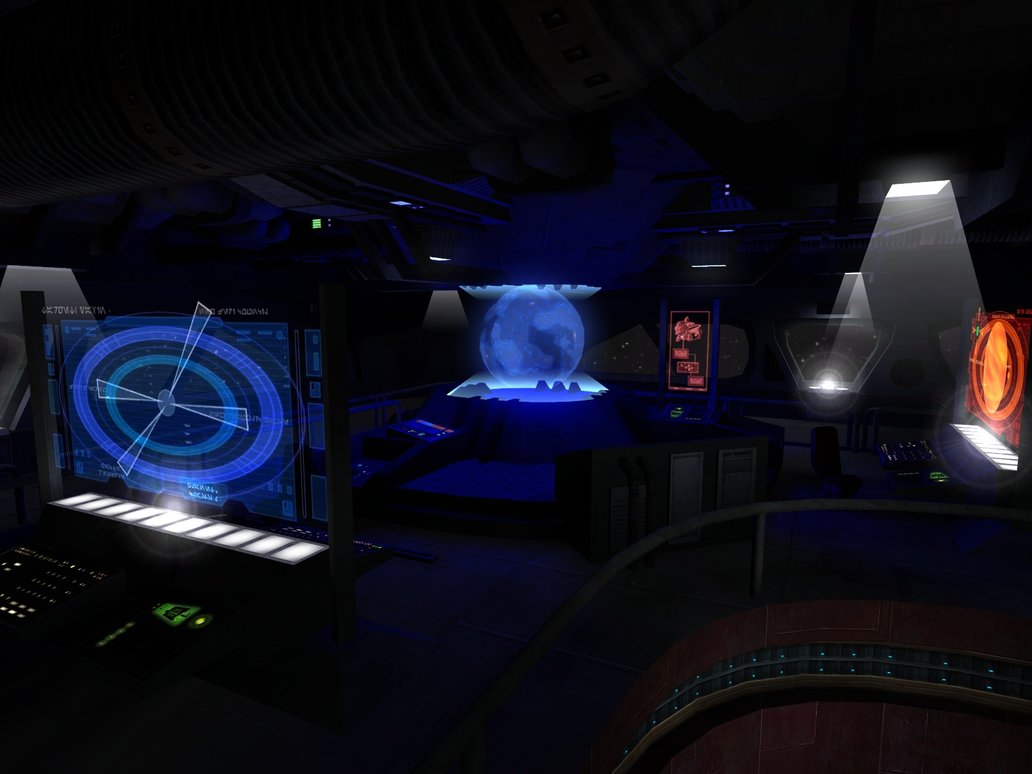
Navigation room C105, located starboard side aft of hatchway 1-10 in passageway 1LP0. Ship's stellar cartography system.
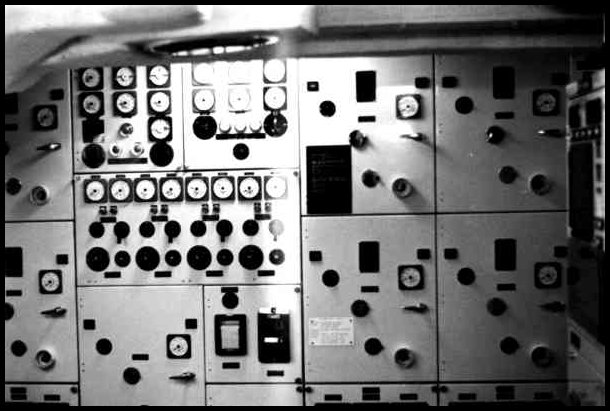
Primary switchboard C109, starboardside aft of C107 in passageway 1LP0. Controls EPS battery power to Division A.
Washroom L111, starboardside through an L112 stairway access. Reserved for use by resident of L112.
|
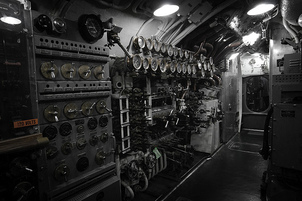
Comm room C107, starboardside aft of C105 in passageway 1LP0. Sometimes called the radio shack.

Escape pods 106 and 108, portside aft of E104 in passageway 1LP0. Ejected to port side. Each accommodates 3.
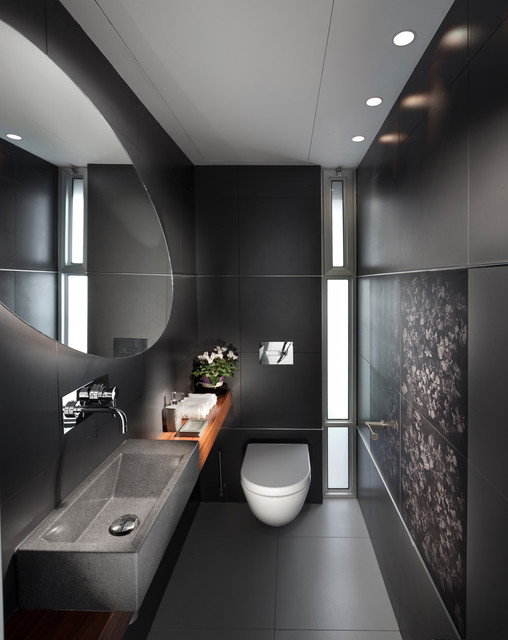
Head L110, portside aft of escape pod A108 hatchway. For use of bridge crew and resident of stateroom L112.
|
|
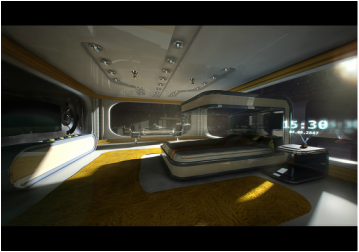
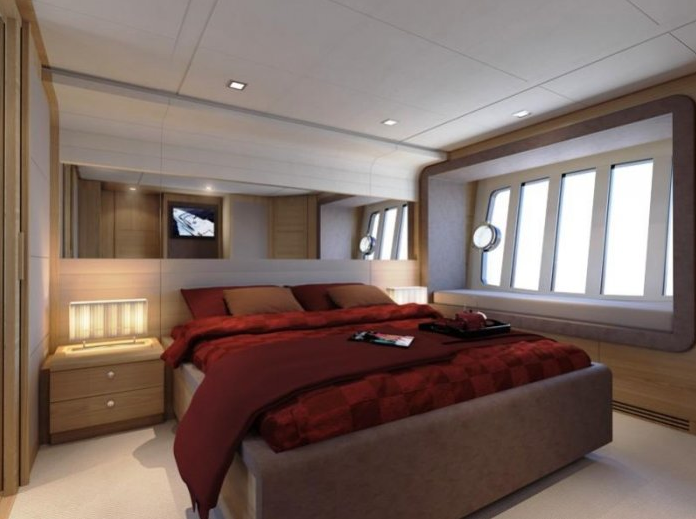
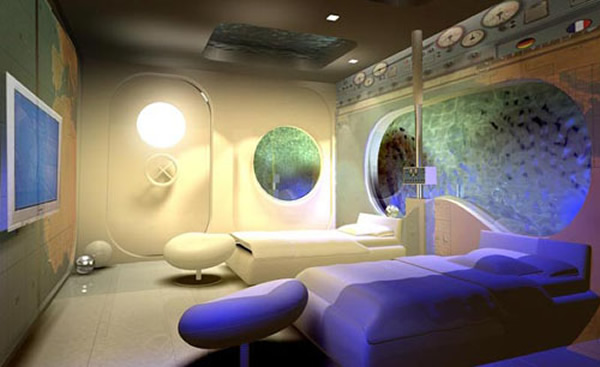
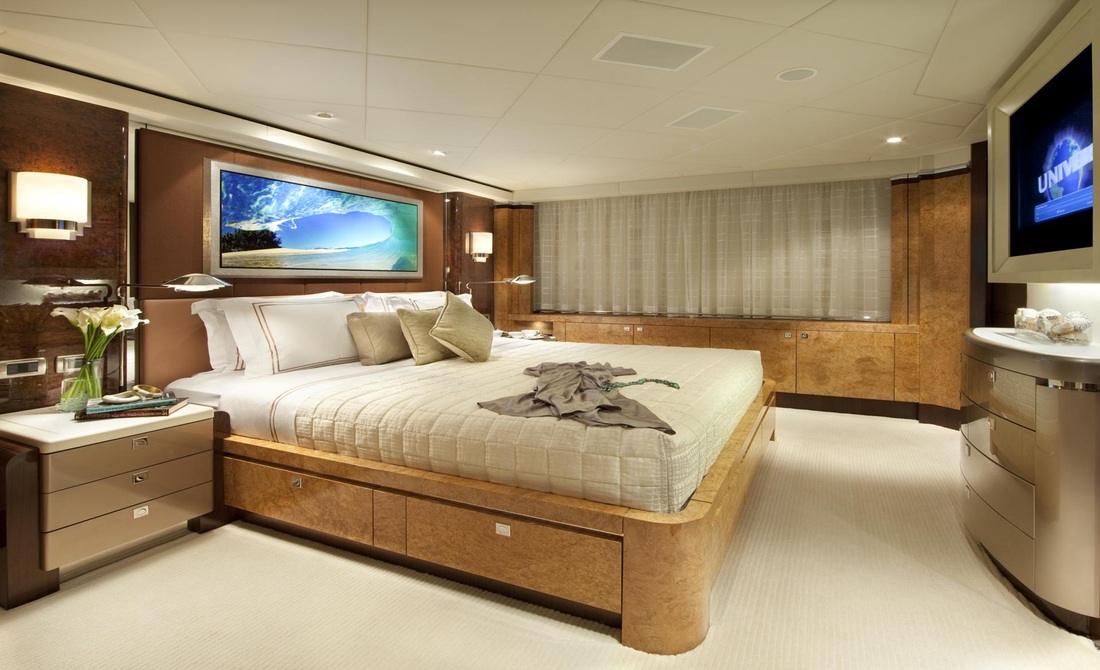
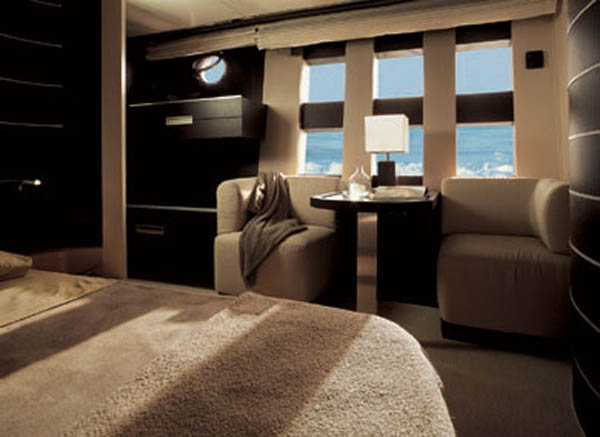
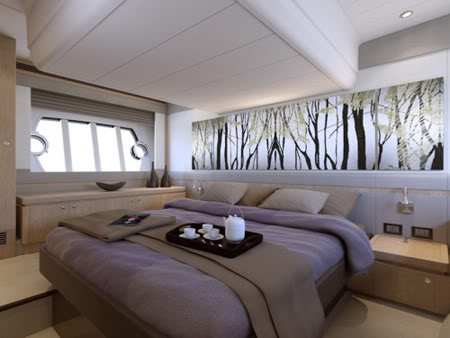
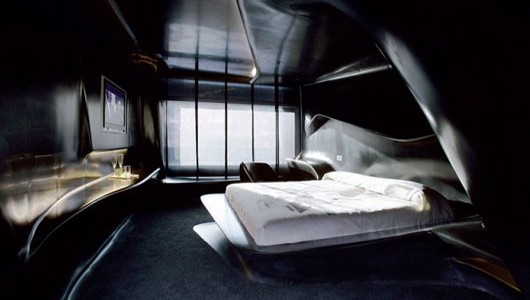
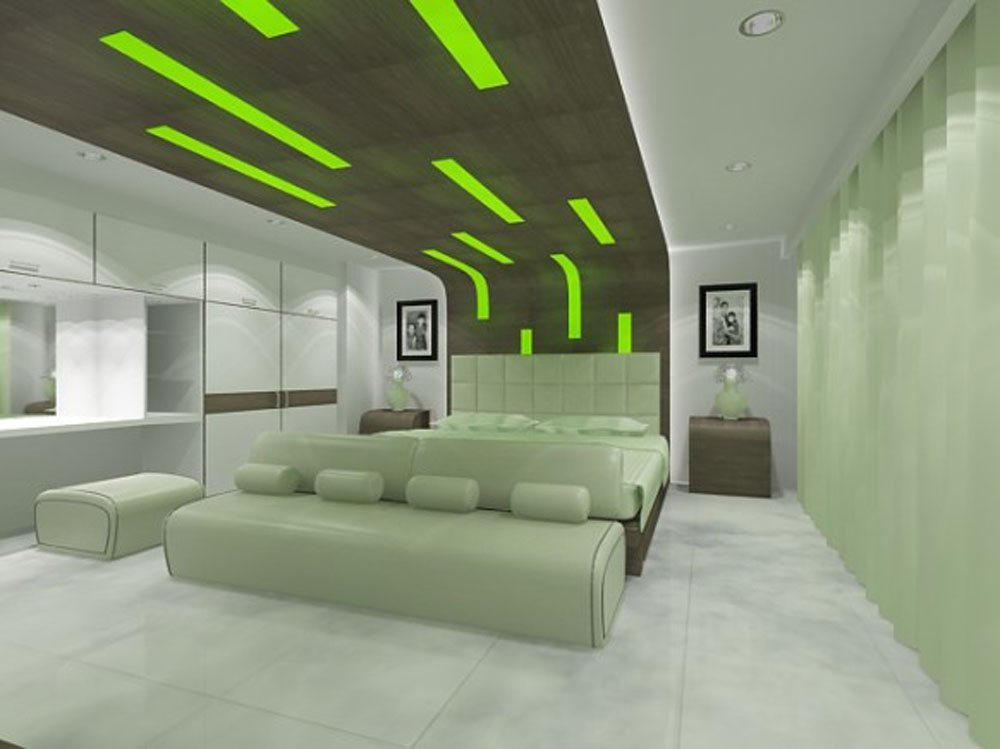
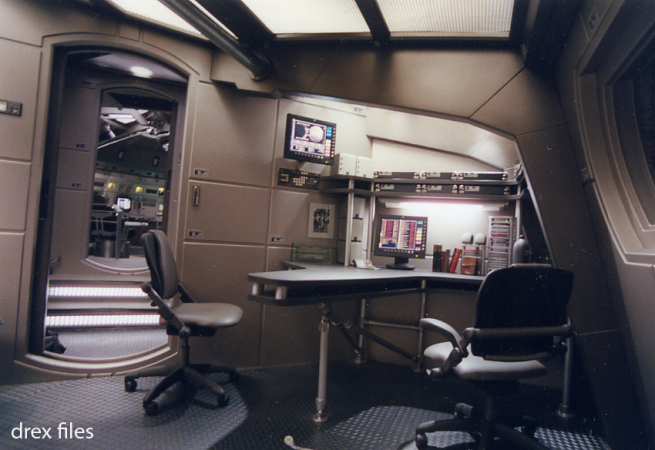
Stateroom L112, accessed via starboardside alcove at aftward end of passageway 1LP0. The compartment includes L111 scuttle access.
The alcove entryway has large FIPEL lighting panels and access to the split-level washroom L111. This compartment was used by Materiel Droz during her tenure as Captain of SS Fawkes. Unsentimental, she left few personal items behind. |
DECK TWO: CREW MESS DECK
Deck 2 is approximately 31 meters (101 ft) long, 22 meters (72 ft) wide and constructed around five latitudinal frames numbered 8-12, connected to one another by a ring of four passageways 2LP1-2LP4 and a center-line posterior passageway 2LP0. This deck is in superior condition compared to all others, excepting the passenger mess deck.
|
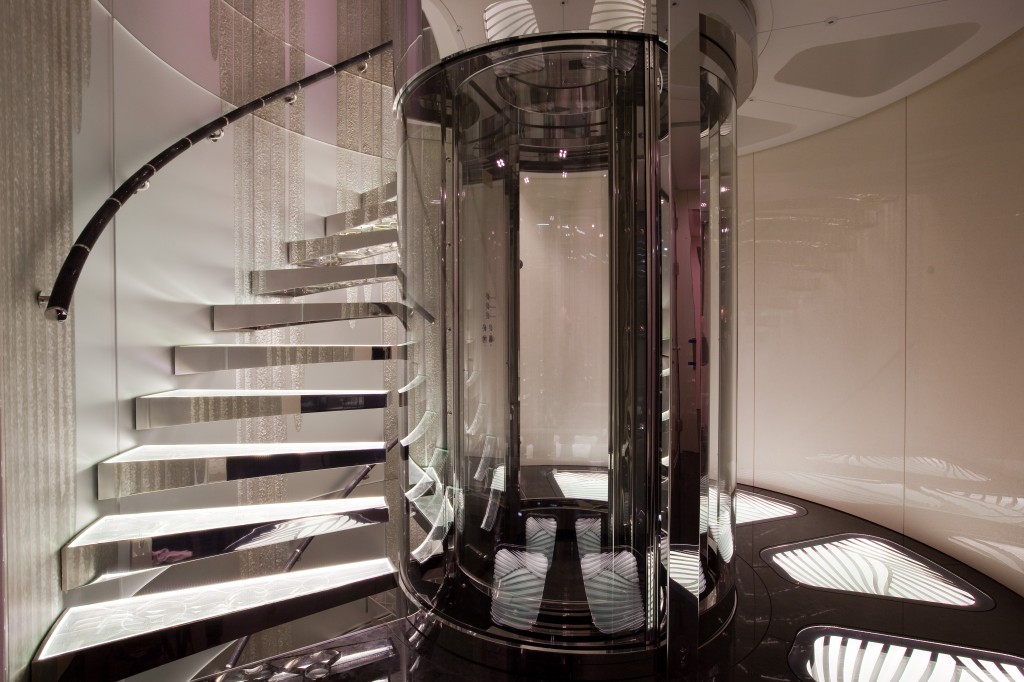
The personnel lift running through compartment E222 was modernized by the Ferengi procurer at Deep Space 9. It has been fitted with 360-degree high definition video panels capable of projecting a variety of programmable environments. Not quite as exciting as a holosuite, it can still provide users with an interesting diversion.
E222 lands in portside passageway 2LP4 via hatchway 2-10-11 just forward of the galley. The service lift E212, which does not feature video panels, terminates via hatchway 2-9-8 near the hatchway leading into 2LP3, where it turns starboard across the deck. |
|
The circuit of passageways 2LP1-2LP4, which cross both frames 9 and 10, surrounds the common crew spaces, including the galley L219, commissary L218, dry stores L221, freezer E220 and wardroom L217. Portside passageway 2LP4 turns starboard into latitudinal passageway 2LP3 at hatchway 2-9-6, which in turn switches back aftward through hatchway 2-9-5 into 2LP2, which makes one last latitudinal turn back to port, meeting up with 2LP1 at hatchway 2-10-3. Passageway 2LP1, which marks Frame 11, makes a junction at hatchway 2-11 leading into center-line passageway 2LP0, which runs aft all the way through Frame 12's 2-12 hatchway to the escape pods.
PASSAGEWAY 2LP0 [LONGITUDINAL CENTER-LINE FRAME 11]
2LP0 features a starboardside stairway scuttle at 2-11-1 and hatchways to five compartments: starboardside hatchway 2-11-3 into crew laundry E223; portside hatchway 2-11-2 into supply room E224; portside hatchway 2-11-4 into water drainage tank W226;, starboardside hatchway 2-11-5 into life support compartment W225; portside hatchway 2-11-6 into auxiliary feedwater compartment W227. 2LP0 terminates at escape pod hatchways 2-12-3 through 2-12-6.
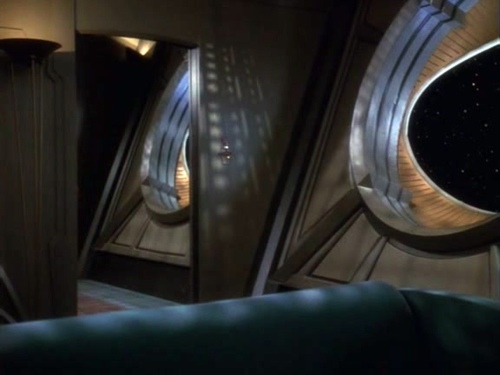
Escape pods. There are three of these available at the aft terminus of center-line passageway 2LP0, numbered by clockwise E229, E230 and E231. The first and last are ejected to port and stern, while E230 is ejected up and outward over the cargo section. The pods are built from a Denobulan design and can accommodated three for a maximum of twenty days. Space exists for a fourth portside pod, E228, but this was apparently ejected at some time in the past.
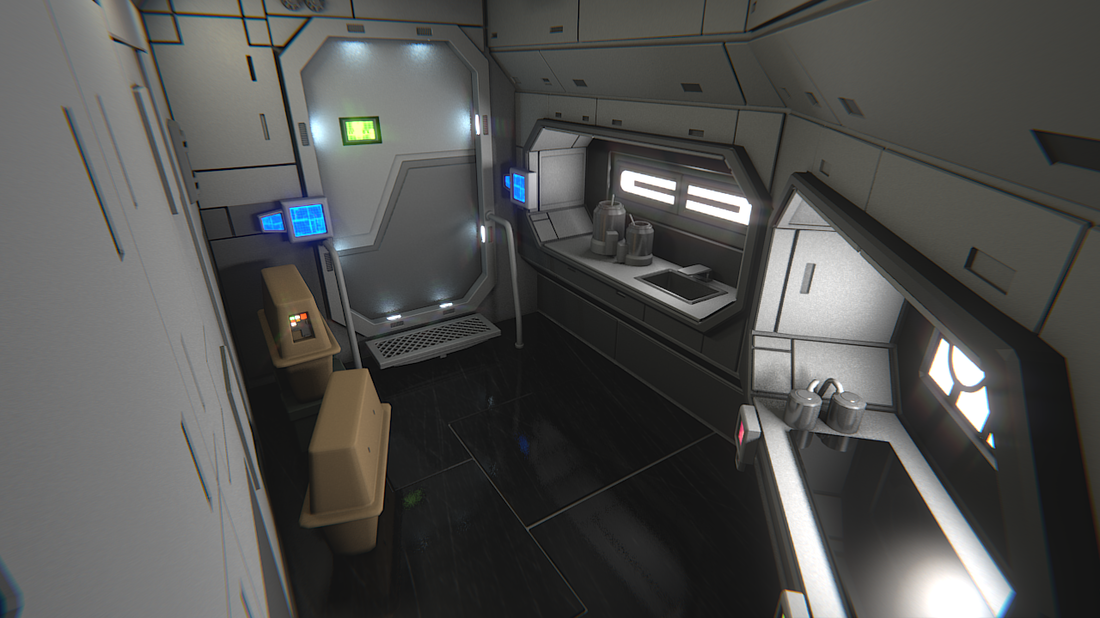
Passageway 2LP0 looking forward at hatchway 2-11. The scuttle and laundry hatchway are to the right, while the hatchway to supply room E224 is to the left. From the looks of it this was the last place the Deep Space 9 contractors had the opportunity to work; indeed, there are signs that they did not quite have time to finish renovations, as 2LP0's compartments attest.
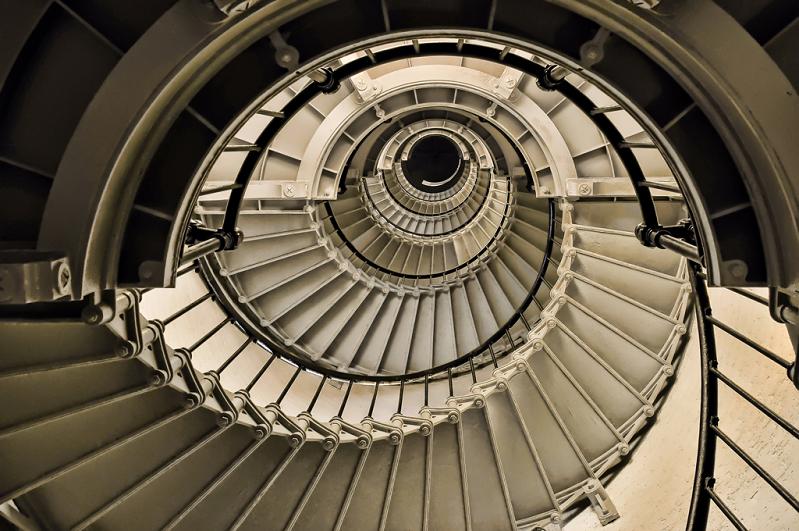
Stairway scuttle 2-11-1 leading from passageway 2LP0 up into navigation room C105 on Deck 1, as well as down into passageway 3LP0 on Deck 3. This scuttle was not renovated by the Ferengi during the time SS Fawkes was at Deep Space 9, and has not been properly maintained for years.
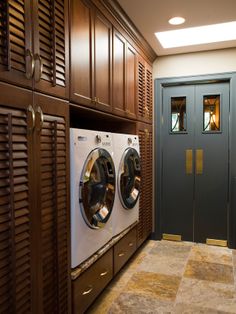
Crew laundry room at E223. Located in passageway 2LP0 aft of hatchway 2-11, starboard side. Limited storage space for spare bedding and cleaning supplies.
Life support compartment W225, aft of E233 in passageway 2LP0. Water and environmental control access.
|
Auxiliary feedwater compartment W227 in passageway 2LP0, port side. These tanks supply reactor and EPS coolant.
Supply room E224 located portside aft of hatchway 2-11 in passageway 2LP0. Dry goods, light tools and maintenance supplies.
|
PASSAGEWAY 2LP1 [LATITUDINAL FRAME 10]
Frame 10 latitudinal passageway 2LP1, facing port to starboard. To the right of the conference table is the aftward junction where hatchway 2-11 leads into passageway 2LP0. Further down the passage is both the right-hand entryway to crew cabin L201 and the left-hand hatchway 2-9-1 leading into the starboardside passageway 2LP1. Behind the viewer, to the right, is hatchway 2-10-13 into crew cabin L216.
This seating area can be used for meetings, dining or recreation.
This seating area can be used for meetings, dining or recreation.
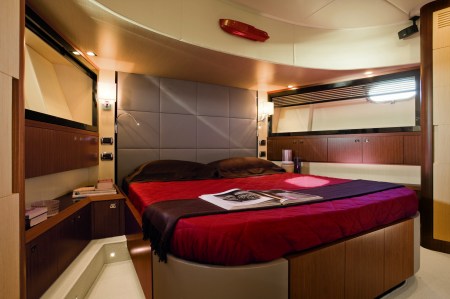
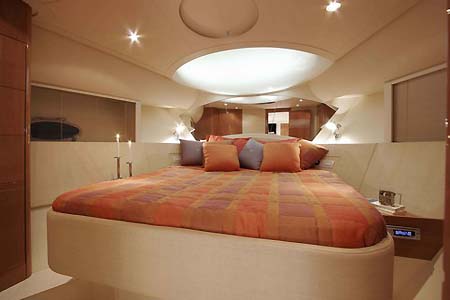
Crew cabin L201 located on aft starboard end of passageway 2LP1. Currently used by Jeremy Haskins.
|
Crew cabin L216. Used by Flaxen during his stay forward; currently unassigned.
|
PASSAGEWAY 2LP4 [PORTSIDE LONGITUDINAL FRAME 9-10]
|
Traveling clockwise around the mess circuit brings the visitor through hatchway 2-9-6 into passageway 2LP4.
Hatchways for five crew cabins and the service lift line the left side of the passageway, while on the right side, from aft to forward, are the lift and hatchways into crew galley L219, commissary L218 and wardroom L217. 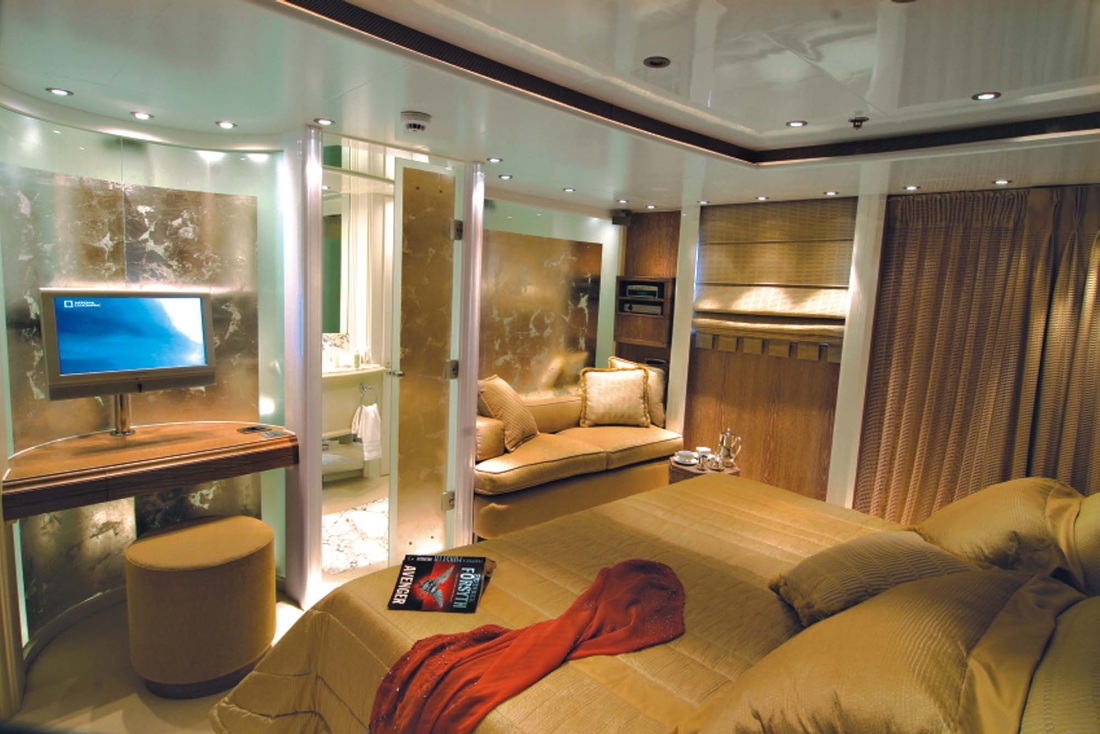
Crew cabin L215. Used by Zanaz during her brief stay, also by Kristiana Petrova; currently unassigned.
Crew cabin L213. Assigned to Ecbe (with room for an additional person).
Galley L219. Features entryways into the commissary L218, dry stores L221 and freezer L220.
|
Crew cabin L214, accessed via 2-10-23. Currently unassigned.
Service lift E212, accessed via 2-9-8. This lift is large enough to accommodate a large freight pallet or ten people.

Crew cabin L211, accessed via hatchway 2-10-12. Assigned to Berek.
|
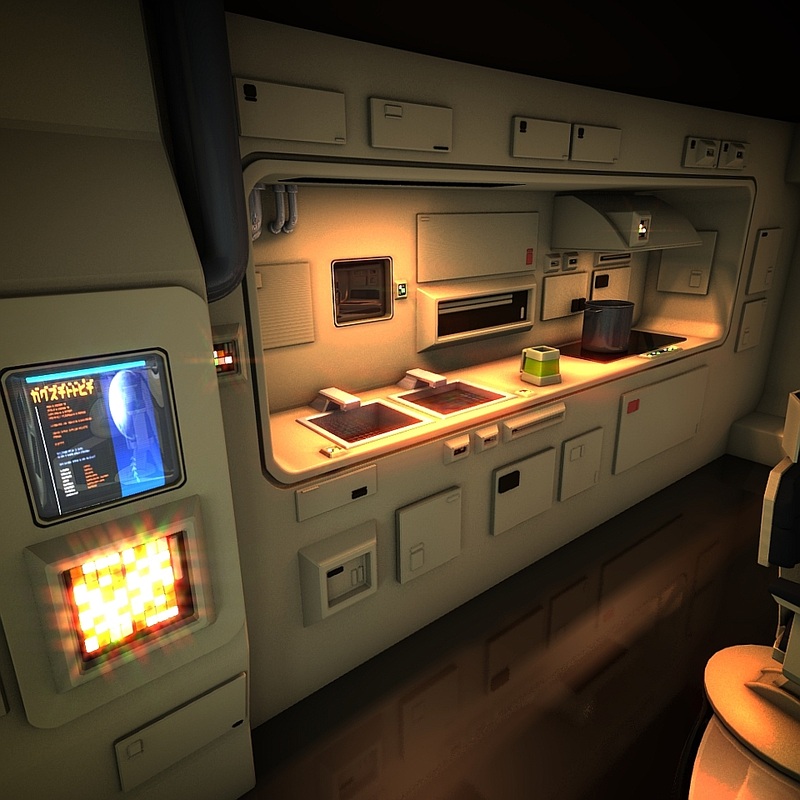
The crew commissary L218 can be accessed via hatchway 2-10-6 in passageway 2LP4, through the crew galley L219, or through the crew wardroom L217. The commissary has a food replicator bay on its starboard side near the entryway to the galley. The replicator is an aging knock-off brand with a peculiar and rather limited program menu.
|

|
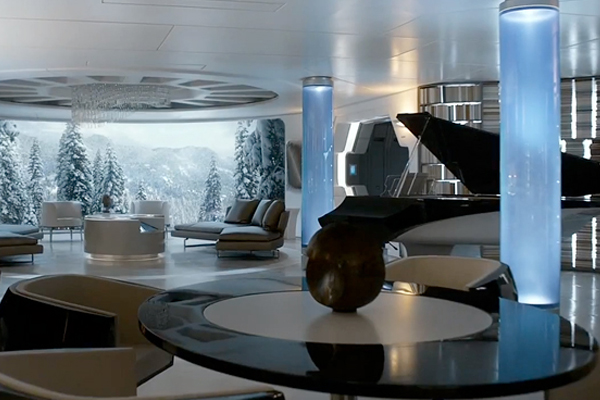
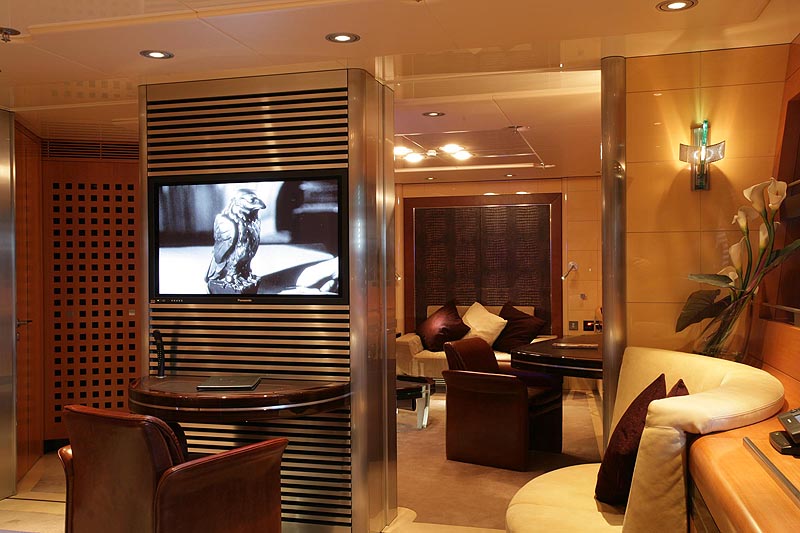
The crew wardroom L217 can be accessed via hatchway 2-9-9 in passageway 2LP4, through the crew commissary L218, or through hatchway 2-9-3 to starboard passageway 2LP1. The wardroom includes a piano, wine bar, surround monitors, library, high definition video panels, several sitting areas and a chandelier. It was renovated by the Ferengi.

|
|
PASSAGEWAY 2LP3 [LATITUDINAL FRAME 8]
|
This passageway runs port to starboard from hatchway 2-9-6 to 2-9-5 within Frame 8. It has hatchways to four crew cabins and two crew washrooms (one for each gender). The washrooms are L213 and L214.
Because the deck is relatively slender, the crew cabins in this frame are slightly more cramped than some of the others. They do, however, boast good views of the bow of the vessel, enjoy good water pressure and little traffic. 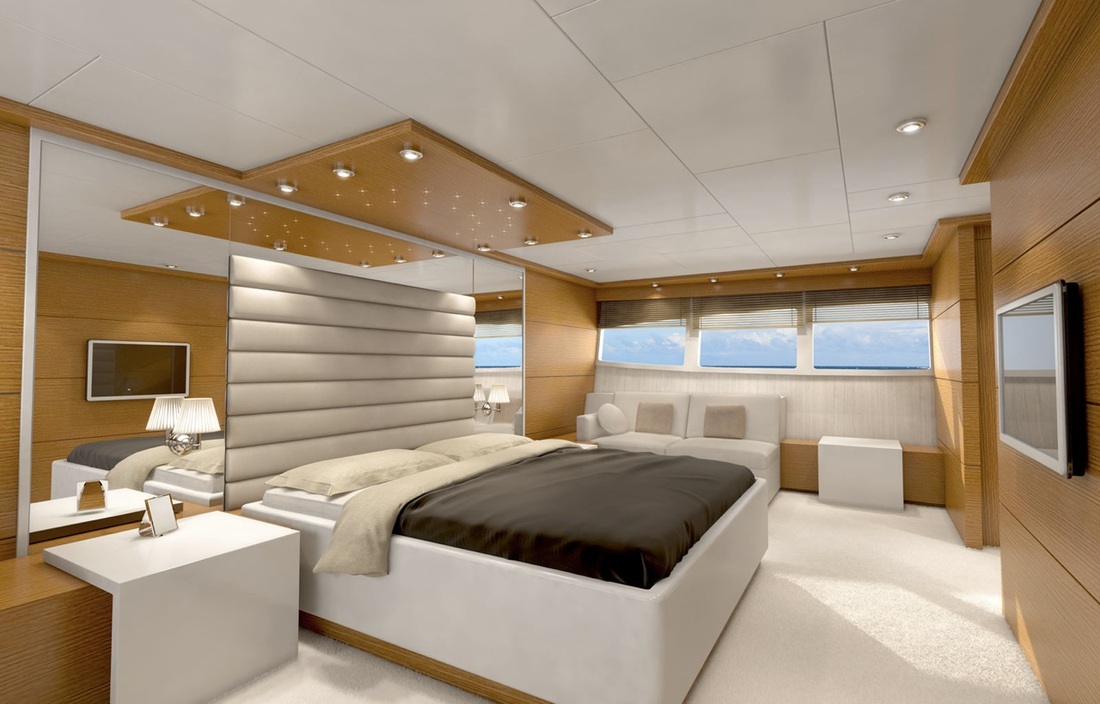
Crew cabin L210, accessed via hatchway 2-8-6. Unassigned.
Crew cabin L208, accessed through hatchway 2-8-4. Unassigned.
|
Crew cabin L209, accessed via 2-8-5. Assigned to Keren.
Crew cabin L207, accessed via 2-8-3. Formerly used by McGee and Dr. Susan Davis. Unassigned.
|
PASSAGEWAY 2LP2 [STARBOARD LONGITUDINAL FRAME 9-10]
|
The starboard passageway on Deck 2 connects the longitudinal 2LP3 and 2LP1 through hatchways 2-9-5 and 2-10-3.
It features hatchways to the deck's five most spacious crew cabins, all of which run along the starboard side of the passage. Just one left-hand hatchway, 2-9-3, leads into the crew wardroom L217. The bridge command center partly intrudes on the deck, so crew cabin L203 is actually a split-level compartment. |
Crew cabin L206, accessed through 2-9-4. Assigned to Olmquist.
Crew cabin L204, accessed through hatchway 2-9-1. Assigned to Behr.
Crew cabin L202, accessed through 2-10-4. Assigned to Eidelwel. Once assigned to Volok, Droz's first mate.
|
Crew cabin L205, accessed through hatchway 2-9-2. Unassigned.
Crew cabin L203, accessed through 2-10-5. Assigned to Sherlock.

Cupola viewport at starboard corner aft of hatchway 2-9-5.
|
DECK THREE: MEDICAL SERVICES, CARGO & CREW TRANSPORT
Deck 3 is approximately 29 meters (96 ft) long, 20 meters (67 ft) wide
and constructed around five latitudinal frames numbered 8-12, connected to one another by a circuit of four wide passageways of roughly equal length, 3LP1-4, and a wide posterior center-line passageway 3LP0 which branches off aftward from a junction with 3LP1 to the Frame 12 transverse airlock leading into Division B's upper bowline access. Deck 3 is in relatively fair
condition. The aft-most third of it, with the exception of 3LP0 and its airlock, is given over to structural support.
There are five pedestrian routes onto this deck: via the service and personnel lifts, personnel transporter, a stairway emergency scuttle leading up to Deck 2 and down to Deck 4, and through the airlock from the Division B cargo access. Passageways are just wide enough for repulsorlift freight equipment to move between forward compartments and the airlock without risking damage to bulkheads.
There are five pedestrian routes onto this deck: via the service and personnel lifts, personnel transporter, a stairway emergency scuttle leading up to Deck 2 and down to Deck 4, and through the airlock from the Division B cargo access. Passageways are just wide enough for repulsorlift freight equipment to move between forward compartments and the airlock without risking damage to bulkheads.
PASSAGEWAY 3LP0 [LONGITUDINAL CENTER-LINE FRAME 11-12]
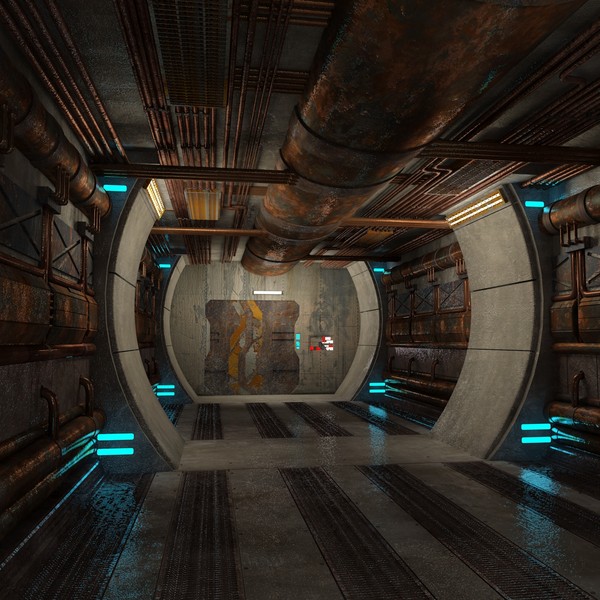
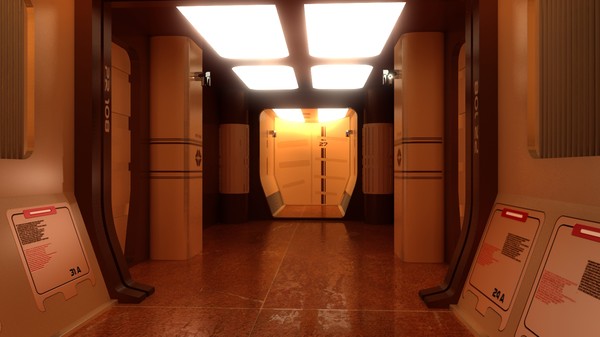
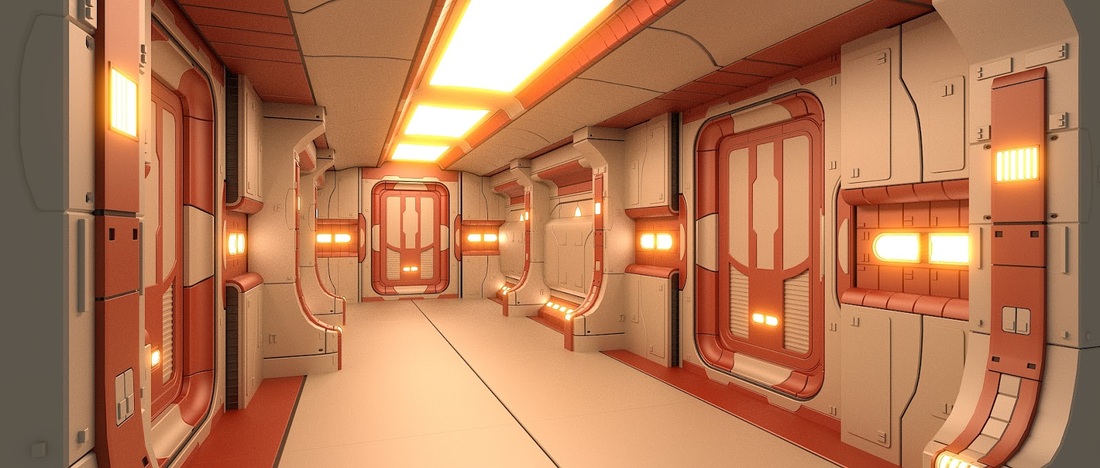
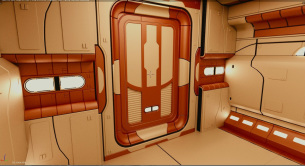
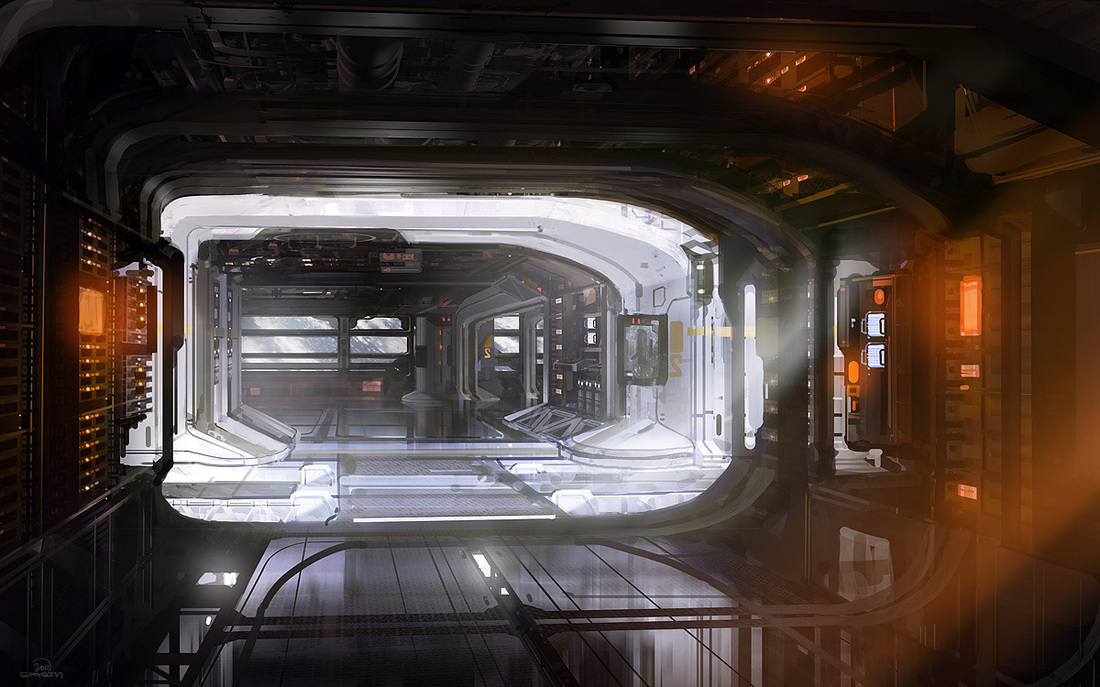
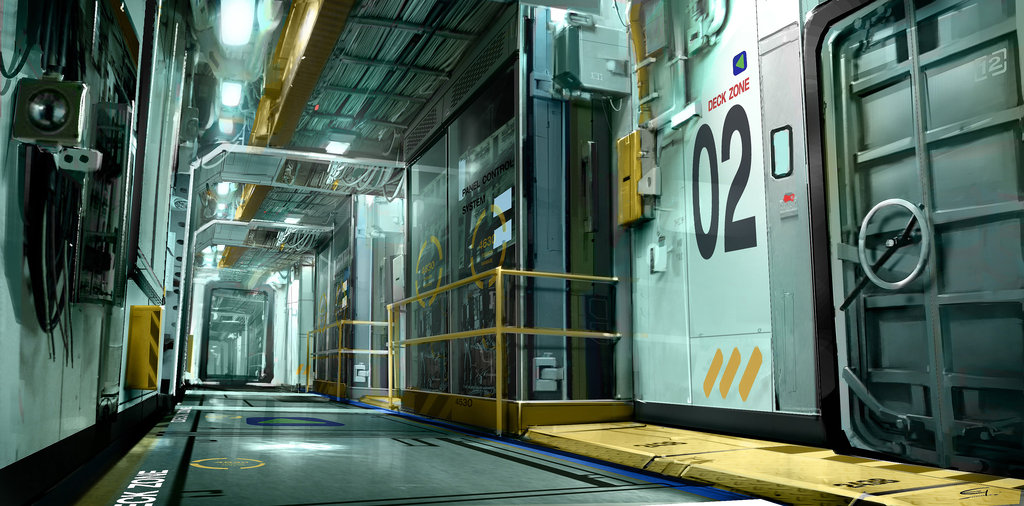
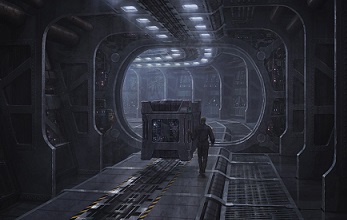
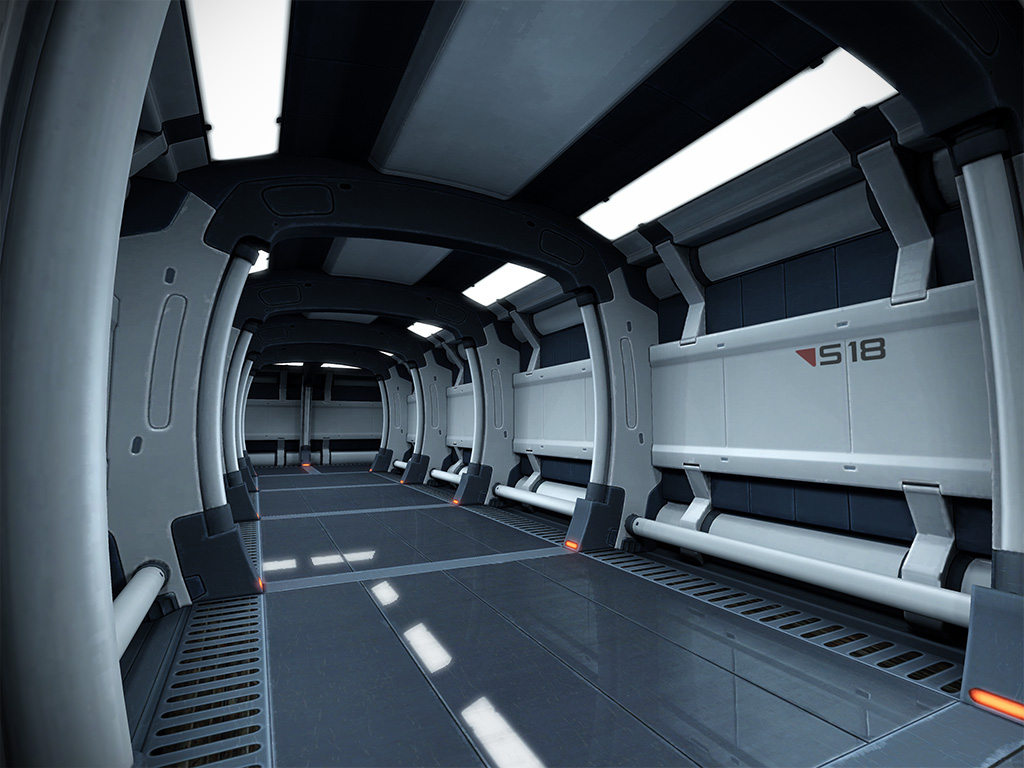
Crew entering the deck from the Frame 12 transverse airlock blast door 3-12 will find themselves in the grimy passageway 3LP0 narthex. The area is wide enough here to preposition more than one piece of cargo handling equipment or utility vehicle and still leave room for egress.
Temperature regulation is difficult in 3LP0, owing to the near-freezing temperatures of the bowline access. Most are likely to continue hastily forward the 9.5 meters (30 ft) to blast door 3-11.
Temperature regulation is difficult in 3LP0, owing to the near-freezing temperatures of the bowline access. Most are likely to continue hastily forward the 9.5 meters (30 ft) to blast door 3-11.
PASSAGEWAY 3LP1 [LATITUDINAL FRAME 10]
|
Passageway 3LP0 passes a few meters beyond 3-11 and into Frame 10 before resolving at an open junction with latitudinal passageway 3LP1. From here visitors can either head right to starboard passageway 3LP2, along the way passing the stairway scuttle 3-11-1 on their right and the left-hand hatchway 3-10-1 leading into Sickbay L301.
|
|
Sickbay has seen better days. Critical equipment dates back to the 2330s and several important components are either missing or worn out. Starfleet Security seized the medical records hardware after the Droz interdiction and Starfleet Marines raided the supply bay.
While the biobeds and scan table function, their ability to record vital data is totally impaired. At its best the bay is equipped to stabilize two patients overnight and treat a third. Serious injuries pose very serious challenges. 
Storage bay L303 is small; however, the last ship physician, Susan Davis, was a specialist in pharmacology and left a number of useable tools behind for the manufacture of various medications.
|
A small office L302 off of sickbay is virtually useless, now that the data drives have been removed, making easy record-keeping impossible.
|
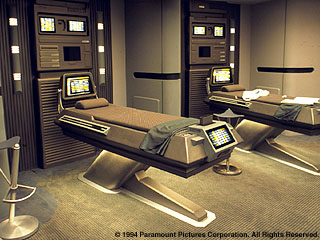
Biobeds are fourth-generation models with badly outdated databases. While they retain the ability to perform standard diagnostic tests on species medically understood up to 2360, they lack the recording hardware necessary to track patient health over time. Ship's physicians are forced instead to print out physical copies and constantly update hand-written charts.
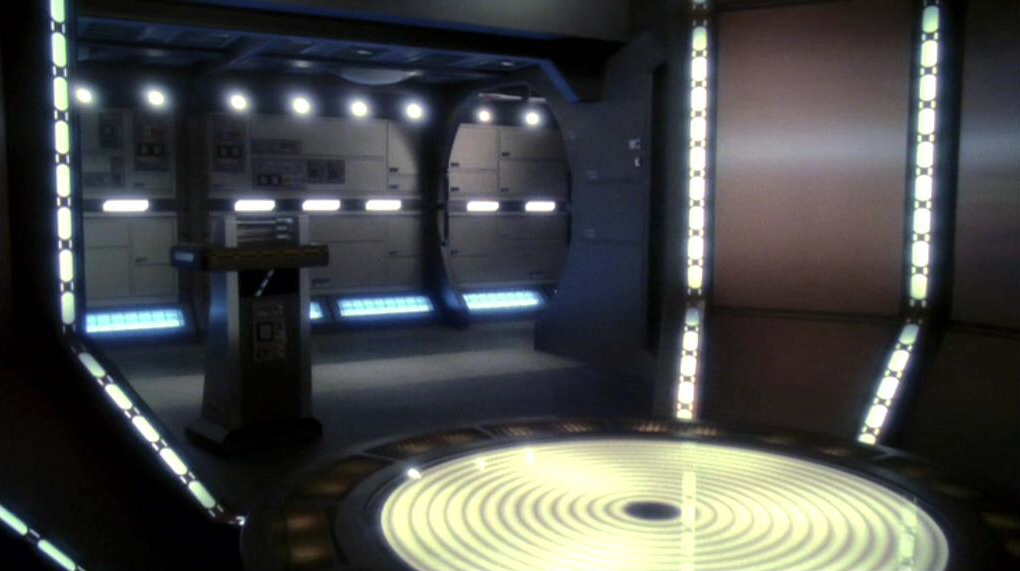
If one turns to port at passageway 3LP1 instead of to starboard, they find that the corridor narrows to an ordinary width, passing by aftward personnel transporter bay E312 before going on through hatchway 3-10-8 into passageway 3LP4.
This interstial transporter is an older model and can only handle two individuals at one time. Its engineering is mostly located further to port and aft of the pad.
This interstial transporter is an older model and can only handle two individuals at one time. Its engineering is mostly located further to port and aft of the pad.
PASSAGEWAY 3LP2 [STARBOARD LONGITUDINAL FRAME 9-10]
This passageway runs along the starboard side of Deck 3 and connects Frame 9 to the forward Frame 8 passageway 3LP3 through hatchway 3-9-2 and aft Frame 10 passageway 3LP1 through hatchway 3-10-3.
At the aft end of 3LP2 is an open observation bay used for physical rehabilitation and relaxation.
|
3LP2 is wide enough to handle the freighter's utility vehicles and cargo handling equipment.
|
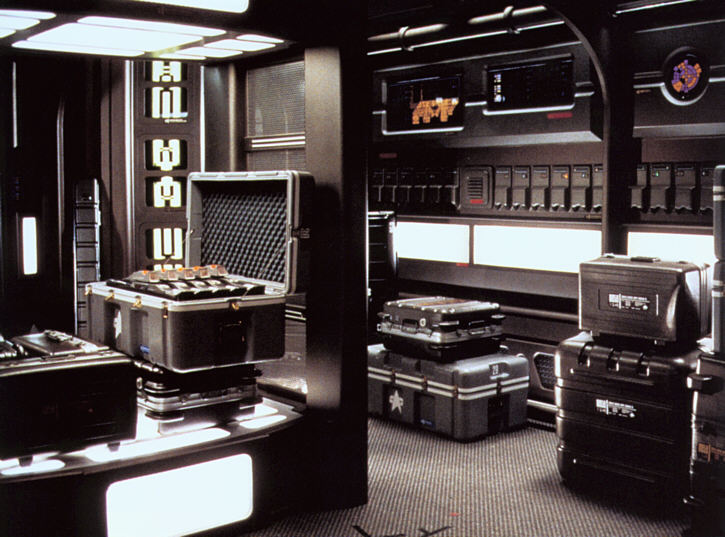
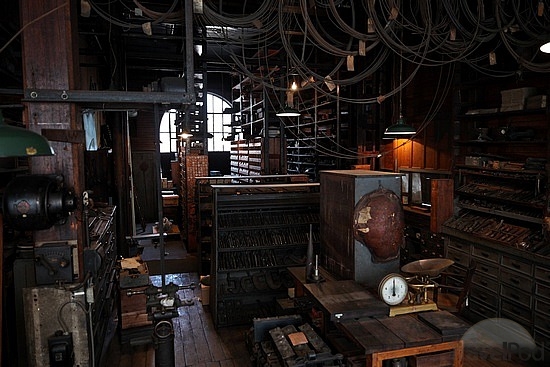
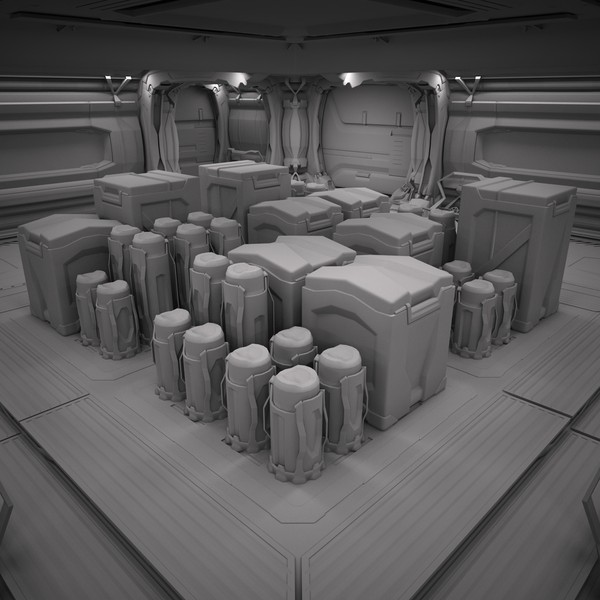
Midway along the left-hand-side of the passage is hatchway 3-9-1. It leads into crew storage room L304, which contains a wide variety of flight cases, storage trunks and minor-store shipping containers. These belonged to Materiel Droz and her old crew, and all have been thoroughly ransacked by Starfleet Security.
It would take too long to enumerate the number or kind of items left behind after the Starfleet interdiction. L304 is not the only compartment of its kind, but here the visitor will find belongings left behind by generations of crew members.
It would take too long to enumerate the number or kind of items left behind after the Starfleet interdiction. L304 is not the only compartment of its kind, but here the visitor will find belongings left behind by generations of crew members.
PASSAGEWAY 3LP3 [LATITUDINAL FRAME 8]
This passageway runs laterally across Frame 8 and connects to the starboard Frame 9 passageway 3LP2 through hatchway 3-9-2 and port Frame 9 passageway 3LP4 through hatchway 3-9-3. It is used for moving large cargo equipment and minor stores pallets, and thus has a greater height and width than regular crew passageways.
There are three compartments in Frame 8: starboardside cargo transporter room E305, accessible via blast door 3-8-1; portside equipment storage A307, accessible via blast door 3-8-2; and an inaccessible feedwater compartment.
There are three compartments in Frame 8: starboardside cargo transporter room E305, accessible via blast door 3-8-1; portside equipment storage A307, accessible via blast door 3-8-2; and an inaccessible feedwater compartment.

The equipment storage bay A307 can be used for just about anything, but traditionally leaves room for the crew to keep broken or damaged cargo equipment until it can be repaired or cannibalized for parts. There is usually at least one cargo load-lifter or anti-grav sled here in an advanced state of disrepair, along with all the small tools that ought to be somewhere else where they're actually needed. A307 currently has a malfunctioning EV system and can't be heated to more than about 2 degrees Celsius, not too much warmer than the dedicated cargo bays. |
The cargo transporter in E305 can be used to beam in both minor stores for the upper bays and equipment or personal supplies for use in the forward section by the crew. This transporter makes it possible for the crew to move their own belongings on and off the ship during a liberty call, even in the event that the boatswain needs the freighter's primary cargo transporters available for regular business operations.
|
PASSAGEWAY 3LP4 [PORT LONGITUDINAL FRAME 9-10]
This passageway runs fore-to-aft along the port side of frames 9 and 10 and connects to the latitudinal Frame 8 passageway 3LP3 through hatchway 3-9-3 and latitudinal Frame 10 passageway 3LP1 through hatchway 3-10-7.
There are a few viewports looking out on the port side of the ship, as well as hatchways into five compartments on the inside bulkhead: hatchway 3-9-5 into quarantine L308; 3-9-6 into cold storage room L309; 3-10-5 into water compartment W310, which feeds the medical facility; 3-10-6 into head L311, and 3-10-7 into personnel lift shaft E12, which is just forward of the hatch to 3LP1. The portside service lift shaft is at E306, accessed via hatchway 3-9-3.
There are a few viewports looking out on the port side of the ship, as well as hatchways into five compartments on the inside bulkhead: hatchway 3-9-5 into quarantine L308; 3-9-6 into cold storage room L309; 3-10-5 into water compartment W310, which feeds the medical facility; 3-10-6 into head L311, and 3-10-7 into personnel lift shaft E12, which is just forward of the hatch to 3LP1. The portside service lift shaft is at E306, accessed via hatchway 3-9-3.
|
Quarantine L308. Unsuited for more than three or four occupants, and the actual field generator is disabled.
Cold storage L309. This compartment can hold emergency rations, medical samples and certain chemical supplies. Also serves as a hiding-place for dead bodies.
|
DECK FOUR: ENVIRONMENTAL CONTROL
Deck 4 is approximately 39 meters (127 ft) long, 21 meters (69 ft) wide and constructed around five latitudinal frames numbered 8-12, though only 8, 9, 10 and 11 are connected to one another, by a circuit of five passageways of unequal length, 4LP1-6, built in a figure-8 shape. Deck 4 is in ugly but working condition. Most of Frame 11 and all of Frame 12 are devoted to structural support.
PASSAGEWAY 4LP1 [CENTER-LINE LATUDINAL FRAME 10]
4LP1 is the port-to-starboard latitudinal passageway on the forward end of Frame 11, and can be accessed through an emergency stairway scuttle either from Deck 3 or Deck 5. This stairway has its own forward-facing hatchway, 4-11-1, making it compartment A401. From there one can turn left or right.
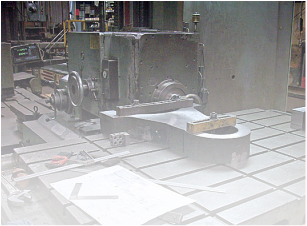
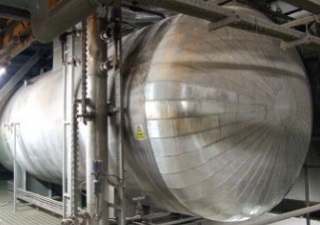
There are two hatchways to the right: hatchway 4-11-1 into longitudinal starboardside passageway 4LP2, and 4-11-2 into drainage tank compartment W402. The latter is the compartment used by Captain Droz to hide a large custom-built crate inside of an Imhoff tank. The crate contains a thumb drive, a portable holographic projector and a portable transporter Kelvin battery component.
There are two hatchways to the right: hatchway 4-11-1 into longitudinal starboardside passageway 4LP2, and 4-11-2 into drainage tank compartment W402. The latter is the compartment used by Captain Droz to hide a large custom-built crate inside of an Imhoff tank. The crate contains a thumb drive, a portable holographic projector and a portable transporter Kelvin battery component.
|
|
There are three hatchways to the left: aftward hatchway 4-11-3 into environmental control room E40X, forward hatchway 4-11-4 into head L40X, and at the far end, hatchway 4-11-5 into portside longitudinal Frame 10 passageway 4LP5.
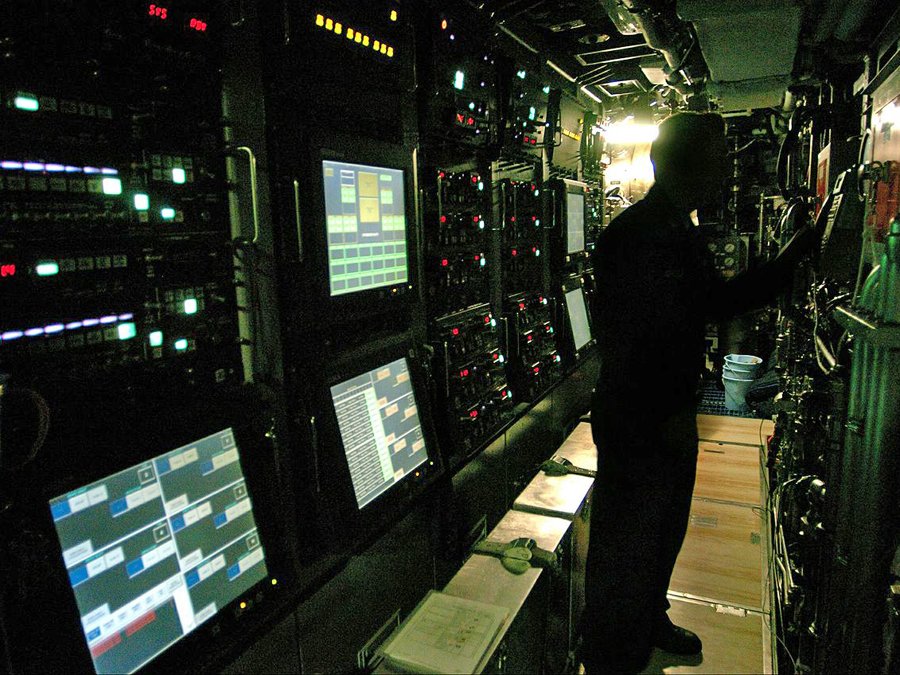
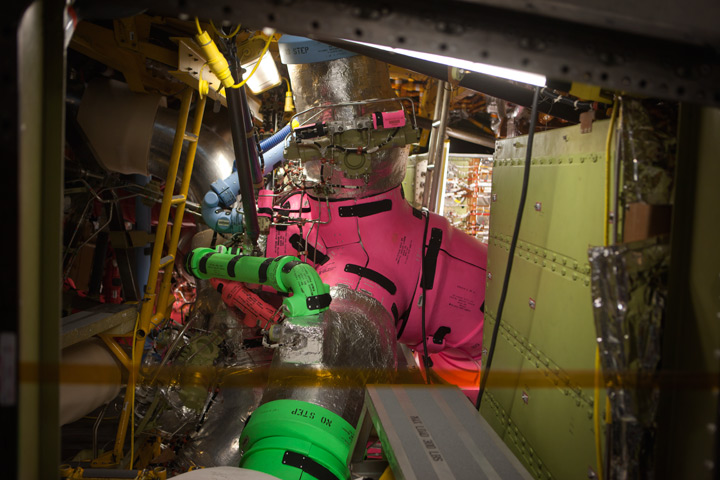
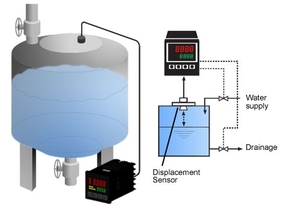
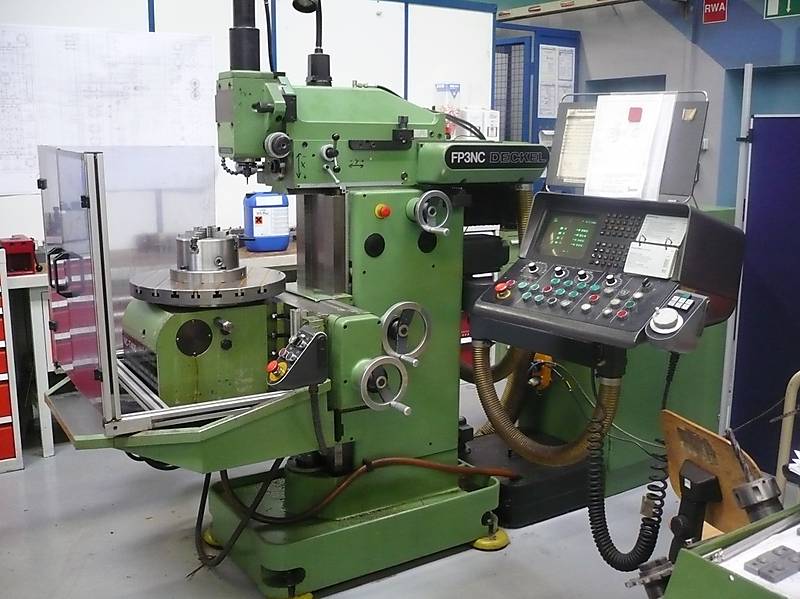
Environmental control E40X is the primary monitoring station for the entire vessel's pressure, water and atmospheric routing. An auxiliary station is located further down on Deck 12, but the controls here will override the auxiliaries as long as they are functioning properly. Able hands like Ecbe will want to monitor this compartment several times a day.
Environmental control E40X is the primary monitoring station for the entire vessel's pressure, water and atmospheric routing. An auxiliary station is located further down on Deck 12, but the controls here will override the auxiliaries as long as they are functioning properly. Able hands like Ecbe will want to monitor this compartment several times a day.
|
|
PASSAGEWAY 4LP2 [STARBOARD LONGITUDINAL FRAME 9-10]
This passageway runs fore-to-aft along the starboard side of frames 9 and 10, connecting to latitudinal Frame 8 passageway 4LP4 through hatchway 4-9-4 and to latitudinal Frame 11 and Frame 10 passageways 4LP1 and 4LP3 through hatchways 4-11-3 and 4-10-6 (the former at the aft end of the passage, the latter about midway along the passageway).
Along 4LP2 there are hatchways leading into eight compartments.
The five on the right access water compartments: From aft to forward, these are hatchway 4-10-2 into septic tank compartment W403; 4-10-5 into wastewater treatment W406; 4-9-1 into evaporator compartment W408; 4-9-2 into pump room W409, and 4-9-5 into reactor feedwater compartment W410.
The inner (left-hand) bulkhead hatchways access three compartments: hatchway 4-10-3 into water compartment W404; 4-10-4 into boiler room E405; finally, 4-10-6 into tool room W407.
Forward view of passageway 4LP2.
Water compartment W404.
Wastewater treatment W406.

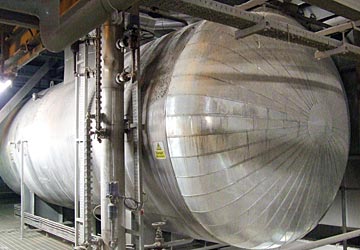
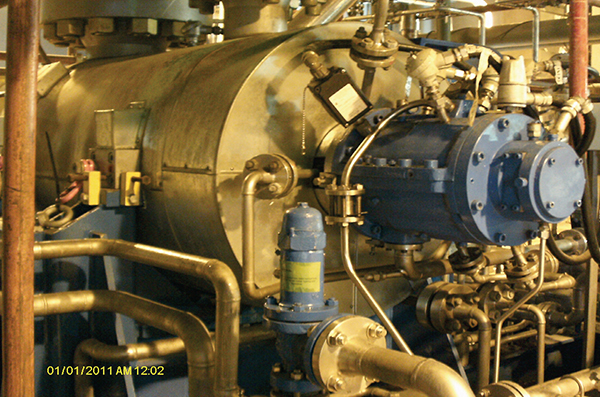
Evaporator compartment W408.
|
Septic tank compartment W403.
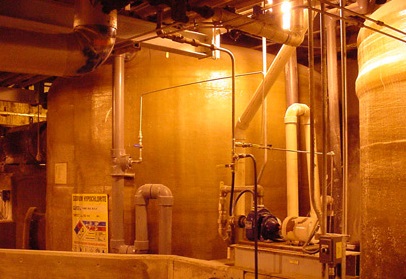
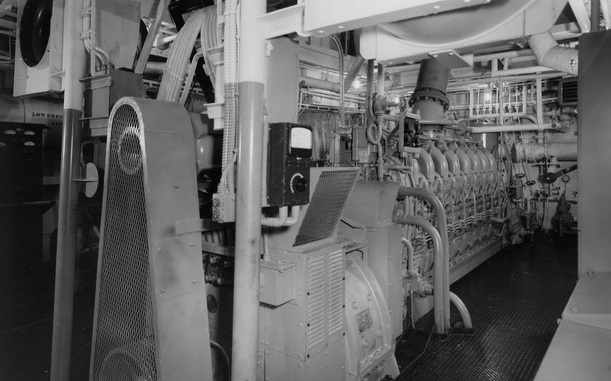
Boiler room E405.
Tool room A407.
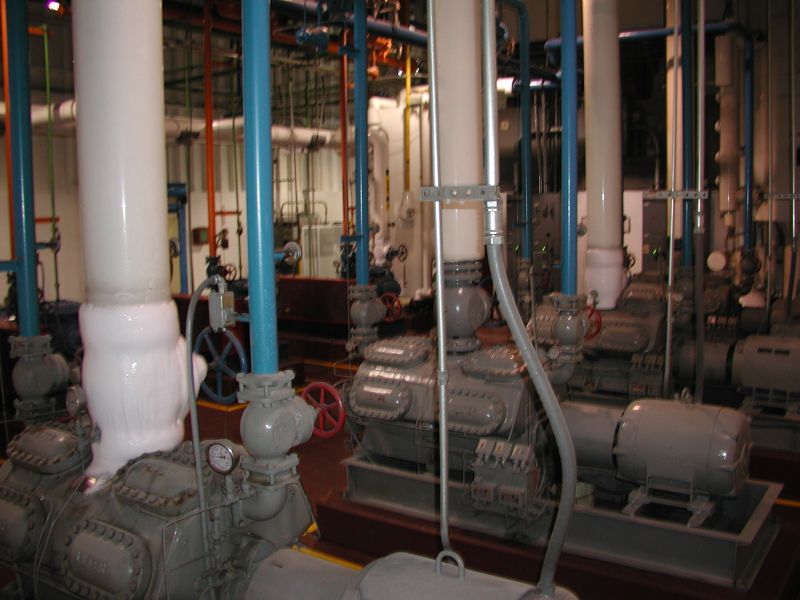
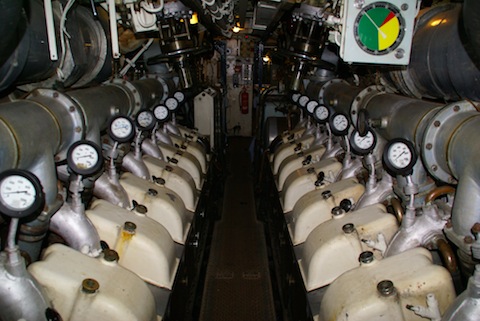
Pump room W409.
|
PASSAGEWAY 4LP3 [LATITUDINAL FRAME 9]
This is simply a short passageway connecting portside passageway 4LP5 and starboardside passageway 4LP2. It is located about halfway down Frame 10, between tool room A407 and recycling compartment E417. There is a single hatchway on the starboard side of the passageway, 4-10-6. It is just wide enough to accommodate cargo equipment.
PASSAGEWAY 4LP4 [LATITUDINAL FRAME 8]
This is the forward-most passageway running aft-to-starboard on Deck 4. It connects through hatchway 4-9-5 into portside passageway 4LP5 and through 4-9-4 into starboardside longitudinal passageway 4LP2. An aft bulkhead cargo hatchway, 4-9-6, accesses crew storage A414.
|
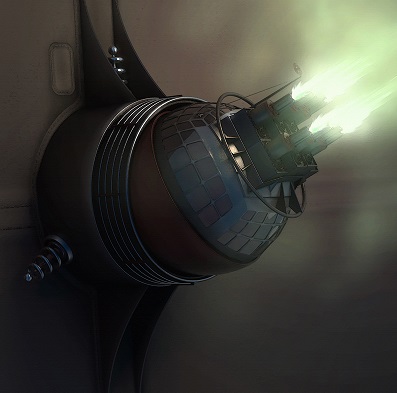
Three compartments accessible through the forward bulkhead, B11, B12 and B13, are devoted to the dorsal spiral wave disruptor battery. The vessel is equipped with four of these aging Cardassian-designed weapons, but only this particular one is currently operational, the others having been overloaded by Starfleet interdictors during Droz's tenure. The three weapon compartments are connected to each other by hatchways. B11 is the guidance module, B12 is the spiral wave generator, and B13 is the actual firing mechanism.
The spiral wave disruptor is a relatively weak weapon and one battery alone will constitute a threat only to those vessels of SS Fawkes's age, speed, or class. The battery has no targeting mobility above thirty degrees and none below ninety degrees. Its rate of fire is one discharge per 25 seconds. It overheats every eight. |
PASSAGEWAY 4LP5 [PORTSIDE LONGITUDINAL FRAME 9-10]
This is the only passageway running along the port side of Deck 4, connecting to the latitudinal passageways 4LP1, 4LP3 and 4LP4, though there are only hatchways at the former and latter. Besides service lift E412, accessible through hatchway 4-9-9 at the forward end of the passageway, and the personnel lift E415, accessible through 4-10-6 at the aft end, 4LP5 also offers access to four compartments: crew storage A414 through 4-9-8; waste compactor E416 through 4-9-10; and recycling compartment E417 through 4-9-11. Latitudinal passageway 4LP3 to 4LP2 is just aft of 4-9-10.
4LP5 is wide enough to accommodate cargo equipment.
4LP5 is wide enough to accommodate cargo equipment.
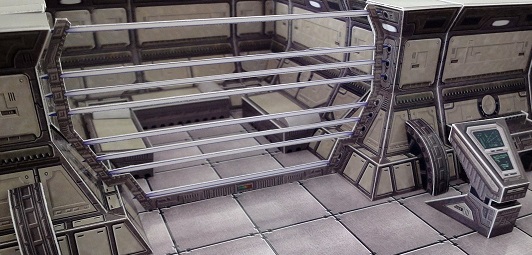
Moving cargo from A414 to the service lift E412 through passageway 4LP4.
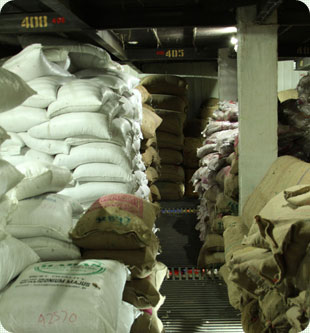
Crew storage A414, accessible through both cargo hatchway 4-8-6 and crew hatchway 4-9-6. Decades worth of junk to sort or sell.
|
View of passageway 4LP3 from 4LP5, looking aft to starboard.
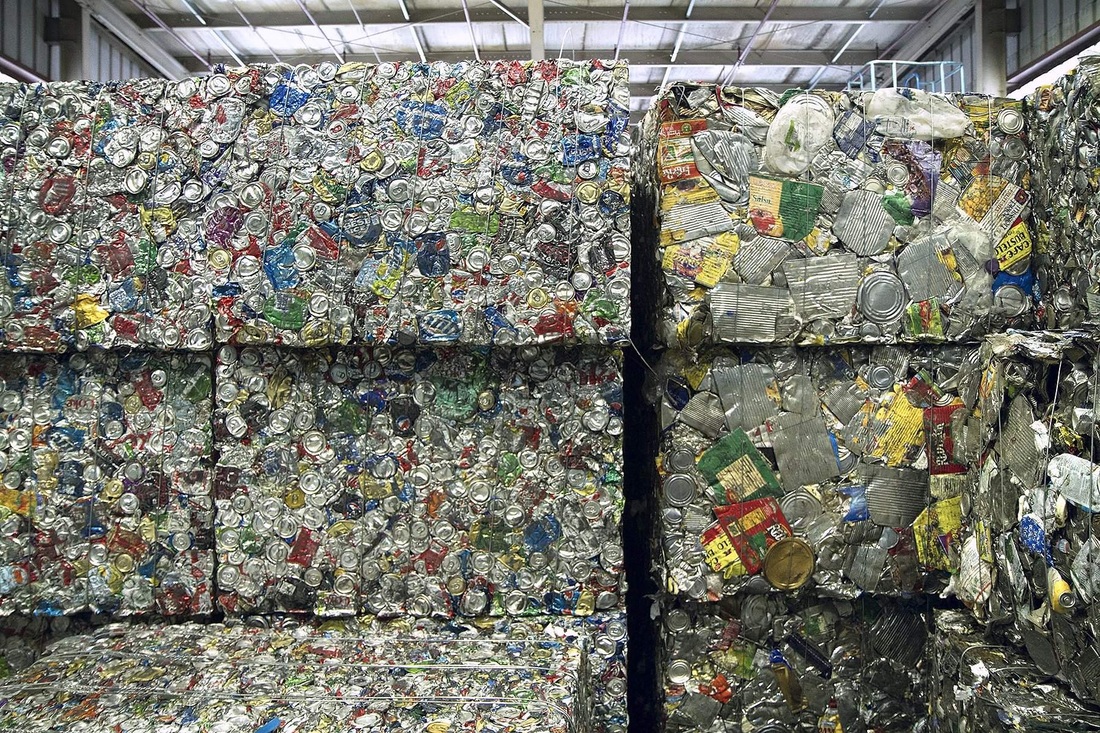
Recycling compartment E417. Bales of scrap metal that no has gotten around to selling for the last decade. A mess.
|
